Failed prints happen to everyone, and you can fix most of them. The common 3d printing problems usually trace back to bed adhesion, temperature, filament or motion, so change one setting at a time.
If you are just starting out, the wider guide to 3d printing for beginners puts these problems in context.
| Item | Value |
|---|---|
| PLA bed temperature | 55-65°C |
| PETG bed temperature | 70-85°C |
| ABS/ASA bed temperature | 100-110°C |
| Suggested first-layer speed | 20-30 mm/s |
| Z offset adjustment step | 0.02mm |
| Brim width to hold corners down | 5-10mm |
These figures come from Obico’s troubleshooting guide. Settings vary by printer and material, so check the source before you rely on them.
Where most print failures start
Troubleshooting guides keep naming the same short list of culprits. One guide says 3D printing problems often come down to “poor bed adhesion, incorrect temperature, wet filament, nozzle clogs, motion issues, or unsuitable slicer settings”, according to QIDI’s troubleshooting guide.
The first layer deserves special attention. Obico’s 2026 guide calls it “the single most common category of 3D printing problems”, because if the first layer fails, the whole print fails (Obico).
Use this quick map to match what you see with where to look first:
- Print peels off the bed: check the build surface, Z offset and first-layer settings.
- Corners lift: this is warping, so look at drafts, bed temperature and brim.
- Thin wisps between parts: this is stringing, so look at filament dryness, temperature and retraction.
- Gaps or thin layers: suspect under-extrusion or a partial clog.
- Layers offset sideways: check belts, speed and anything blocking the print head.
- Tangled mess of filament: the print came loose, so go back to adhesion.
Fixing common 3d printing problems with the first layer
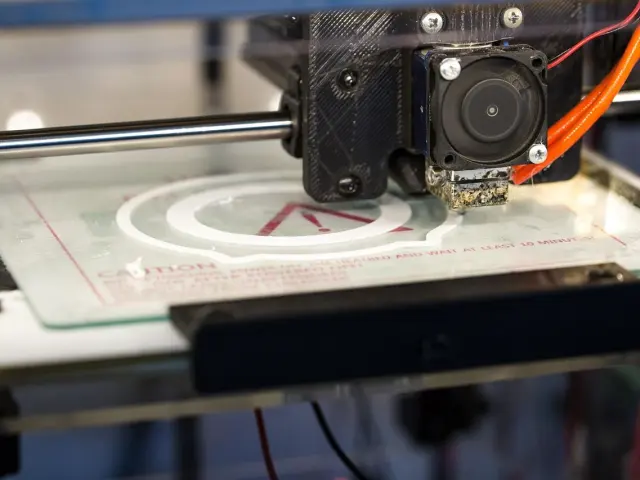
Start with the build surface. Finger oils can reduce adhesion even when the plate looks clean, as QIDI points out. Obico advises you to clean with 91%+ isopropyl alcohol before every print.
Next, check the nozzle height. A good first layer should look slightly flattened, with neighboring lines touching each other, and if the filament looks round and loose, the nozzle is probably too high (QIDI). According to Obico, you should move the Z offset in 0.02mm increments rather than big jumps.
Temperature and speed matter too. Obico lists bed temperatures of 55-65°C for PLA, 70-85°C for PETG and 100-110°C for ABS/ASA. It also recommends slowing the first layer to 20-30 mm/s, whatever your normal speed.
The opposite mistake exists as well. Squashing the nozzle too close can cause elephant’s foot, a bulge at the base of the part, which one source describes as first layers squished too much by heat and weight (Intellectual Point). As QIDI puts it, do not solve adhesion by crushing the first layer too much.
Warping and corner lifting
Warping occurs when the lower layers of a print cool and contract faster than the upper layers, causing corners and edges to pull upward off the bed (Obico).
It is more common with materials that shrink more during cooling, such as ABS, ASA, PC and nylon, but it can also happen with PLA or PETG on large flat parts (QIDI). Because each material behaves differently, it helps to read about the types of 3d printing filament before you pick one for a big part.
The usual fixes are simple:
- Improve first-layer adhesion with a clean plate and a correct Z offset.
- Add a brim so the extra material holds corners down.
- Keep the printer away from windows, doors and air vents.
- Use an enclosure for high-shrink materials.
- Reorient or split large flat parts.
On the numbers, Obico suggests a brim 5-10mm wide and a part cooling fan at 0% for the first 3-5 layers. It also says an enclosure helps with ABS, ASA and nylon, even if it is only a cardboard box. QIDI adds that cold drafts, air conditioning and open windows can cool the print unevenly.
Stringing, oozing and blobs
Stringing happens when melted filament leaks from the nozzle during travel moves, leaving thin wisps of plastic between parts (Obico). Before touching any slicer setting, dry your filament, because one troubleshooting guide says moisture is the top cause (Intellectual Point).
If the spool is dry, work on temperature next. Obico suggests lowering it in 5°C increments and running a temperature tower test, without dropping below the manufacturer’s minimum.
Then tune retraction. Obico gives starting points of 0.5-2mm at 25-45mm/s for direct drive extruders, and 4-7mm at 40-60mm/s for Bowden extruders. It also says to raise travel speed to 150-250mm/s so the filament has less time to ooze.
Under-extrusion, clogs and top-surface gaps
Under-extrusion means not enough plastic is coming out, which produces weak, gappy prints. A full clog is the extreme case: nothing or very little extrudes, sometimes with clicking from the extruder (Intellectual Point).
The same source recommends cleaning a partly blocked nozzle, raising the nozzle temperature a little, and making sure the filament feeds freely and the spool is not tangled. For the opposite problem, blobs and rough walls, it suggests lowering the flow rate in the slicer.
Holes in the top surface have their own cause. MatterHackers notes that pillowing is usually PLA filament specific, and suggests increasing the number of top layers as one fix.
Layer shifts, spaghetti and drooping overhangs
When layers jump sideways, the cause is mechanical. QIDI lists loose belts, excessive speed, nozzle collision and skipped steps, while Intellectual Point says to check that belts are tensioned and pulleys are tight.
Spaghetti is what you get when the print pops loose and the printer keeps extruding into the air. The fix is usually better first-layer adhesion, supports for tall or top-heavy models, and a camera or app that lets you stop the print early (Intellectual Point).
Steep overhangs sag or curl. Slowing down on overhang layers, adding supports and improving part cooling are the standard answers from the same source.
How do you diagnose a failed print?
A calm method beats guessing. A quick read on how does 3d printing work also helps, because each failure maps to a stage of the print.
- Observe: note when it failed (first layer, mid-print or on an overhang) and what the defect looks like.
- Isolate the stage: decide whether it is adhesion, temperature, extrusion or mechanics.
- Change one thing: adjust a single setting at a time so you know what actually fixed it.
- Test and record: reprint and keep a short log of what worked.
This approach comes from Intellectual Point’s troubleshooting guide, and QIDI gives the same warning: changing temperature, flow, retraction and speed all at once may fix one problem while creating another.
Frequently asked questions
What is the most common 3D printing problem?
Show answer
Poor bed adhesion is one of the most common 3D printing problems, according to QIDI. Cleaning the plate and checking the Z offset fixes many cases.
How do I stop stringing?
Show answer
Dry the filament first, then tune retraction and lower the nozzle temperature slightly. Intellectual Point lists these three steps in that order.
Should I use a brim or a raft?
Show answer
A brim suits small footprints and sharp corners prone to warping. Obico calls a raft a last resort, since it adds material waste and leaves a rough bottom surface.
Do I need an enclosure?
Show answer
For ABS, ASA and nylon, an enclosure helps keep the temperature stable, and Obico says even a cardboard box helps. PLA usually prints fine without one.
Can I change several settings at once?
Show answer
It is better not to. Adjust a single setting at a time so you can tell which change worked, as Intellectual Point advises.